SUPPORT//
Home | Support | 
  

Common Issues
Basic Settings
Camera Connection
Camera Operation
App Usage
SD Card Problems
Firmware Update
Charging and Peripheral Devices
After Sales and Others

How do I connect my Android phone for the first time?
Please make sure Bluetooth and Wi-Fi are turned on.
1. Connecting from Photo Album:
a. Open the App and go to the main screen:
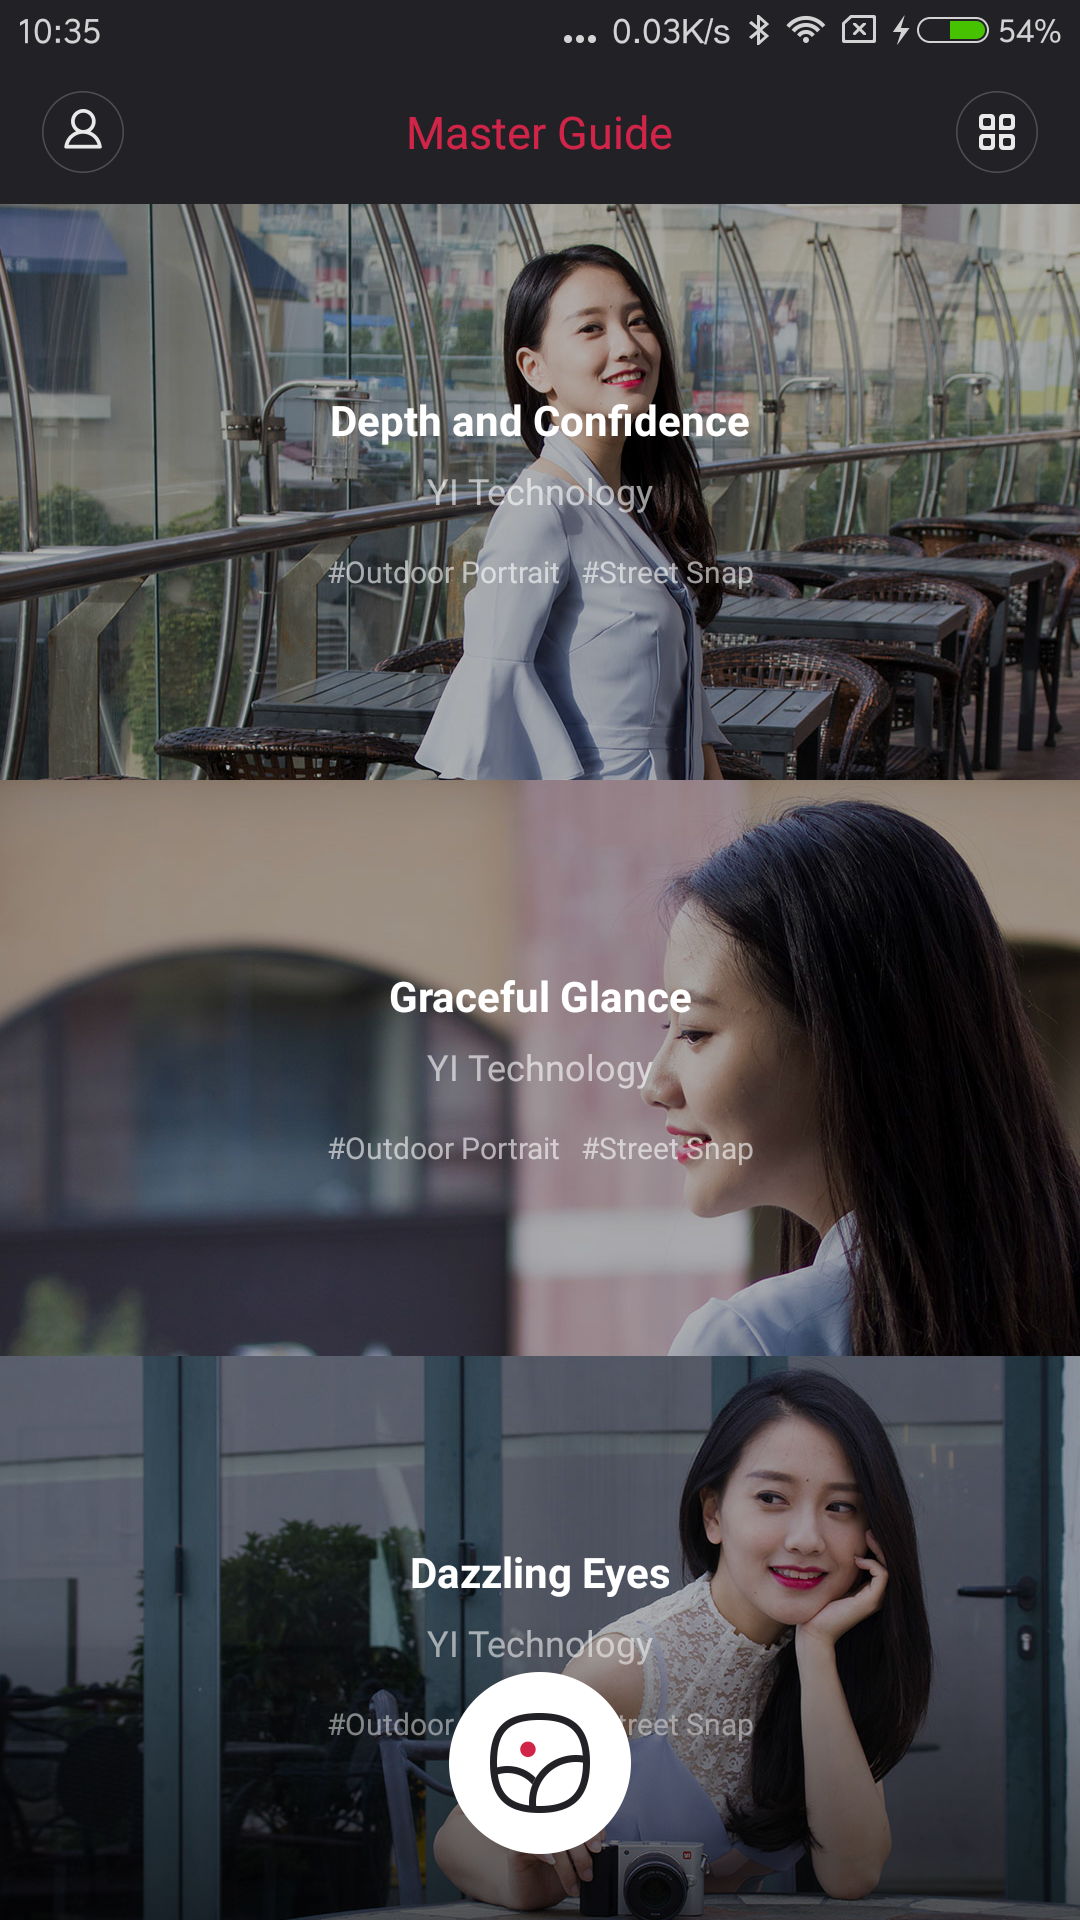
b. Click on the Photo Album icon on the bottom to enter the screen below:
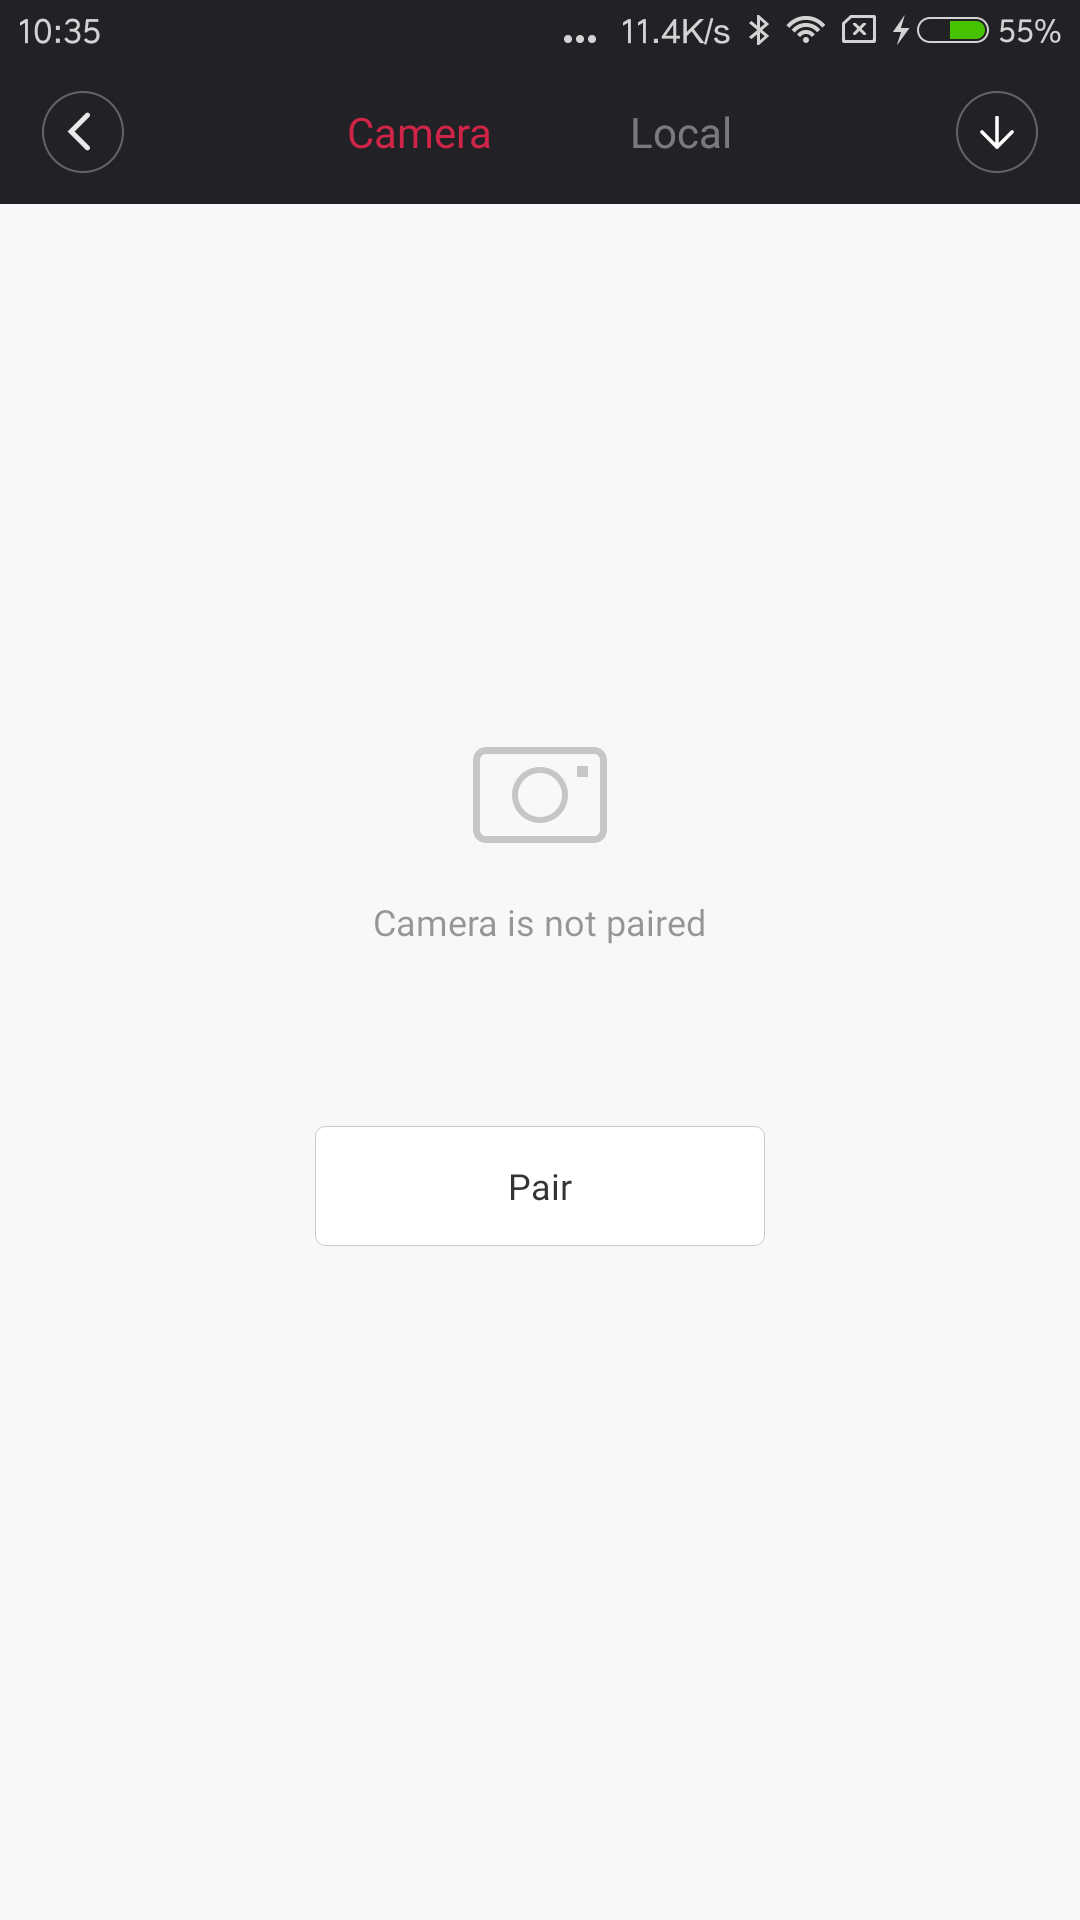
c. Click on 'Pair' to enter the screen below:
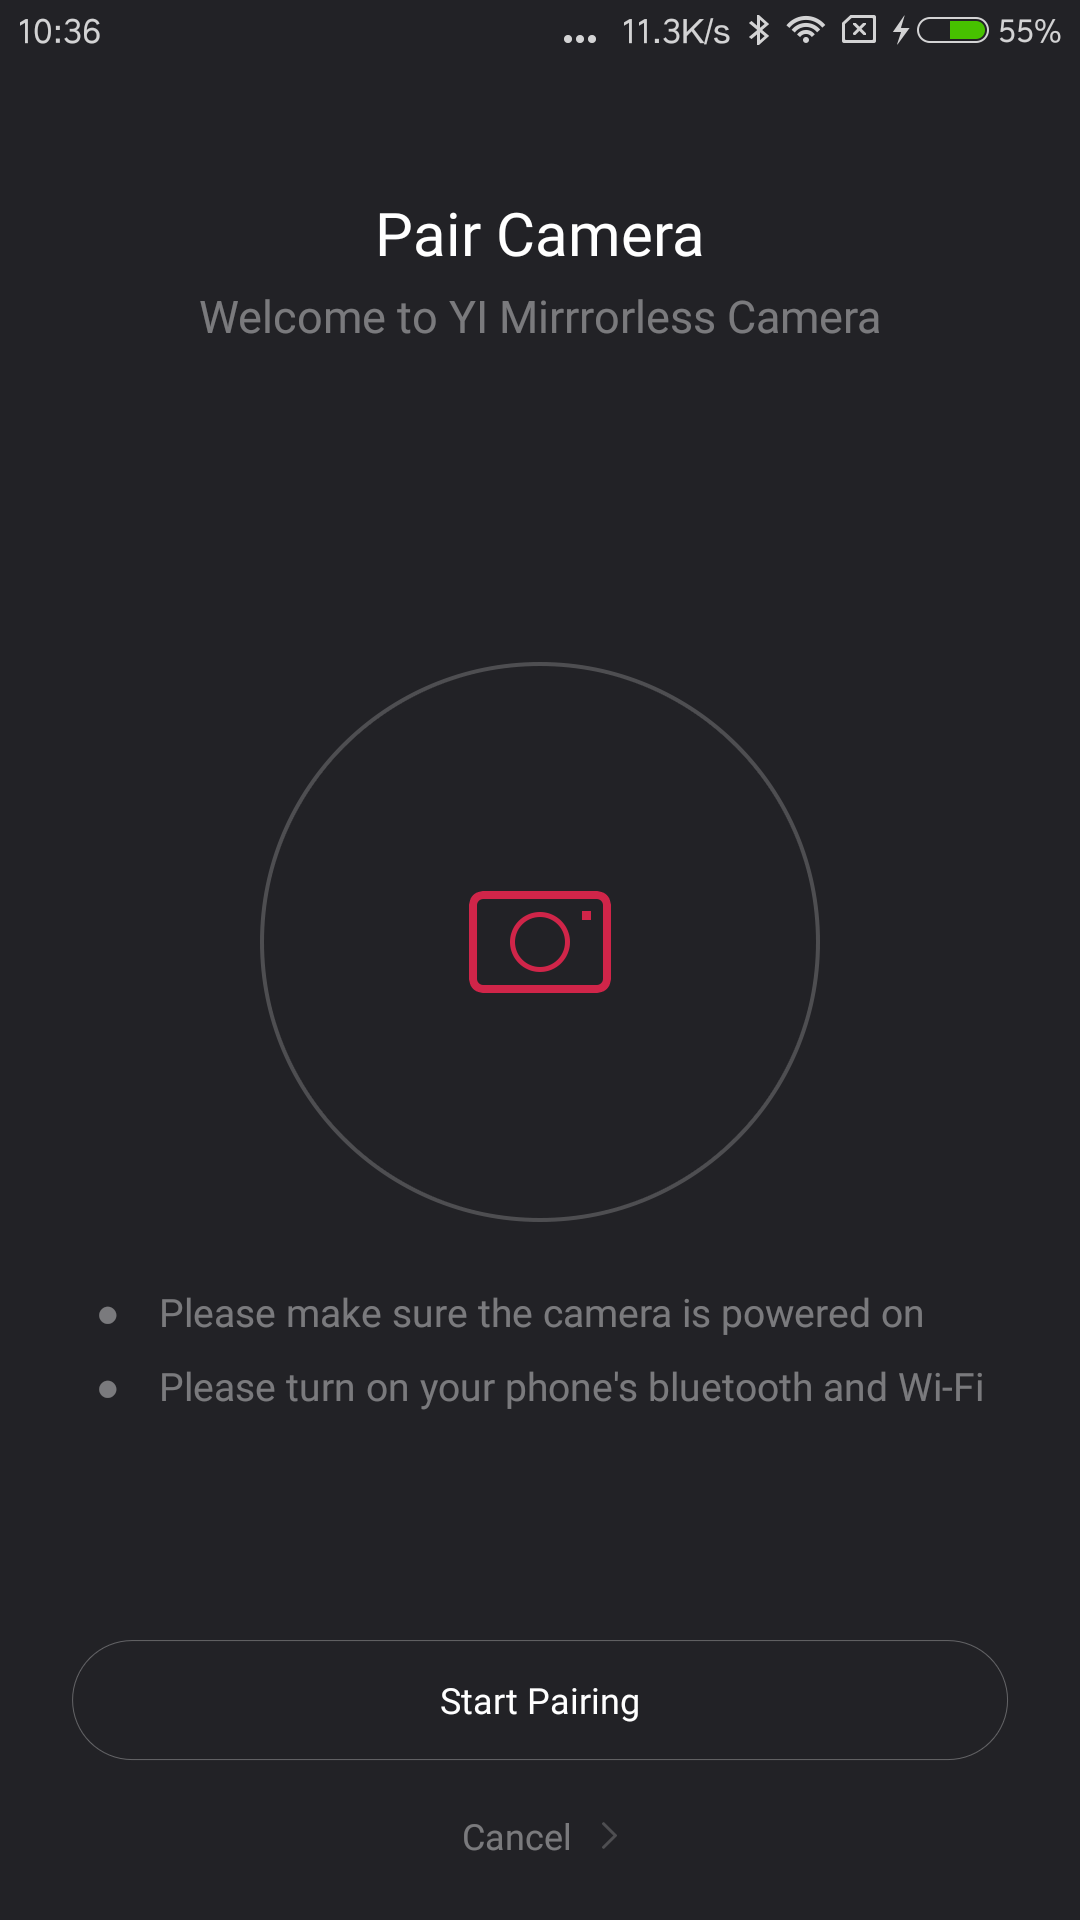
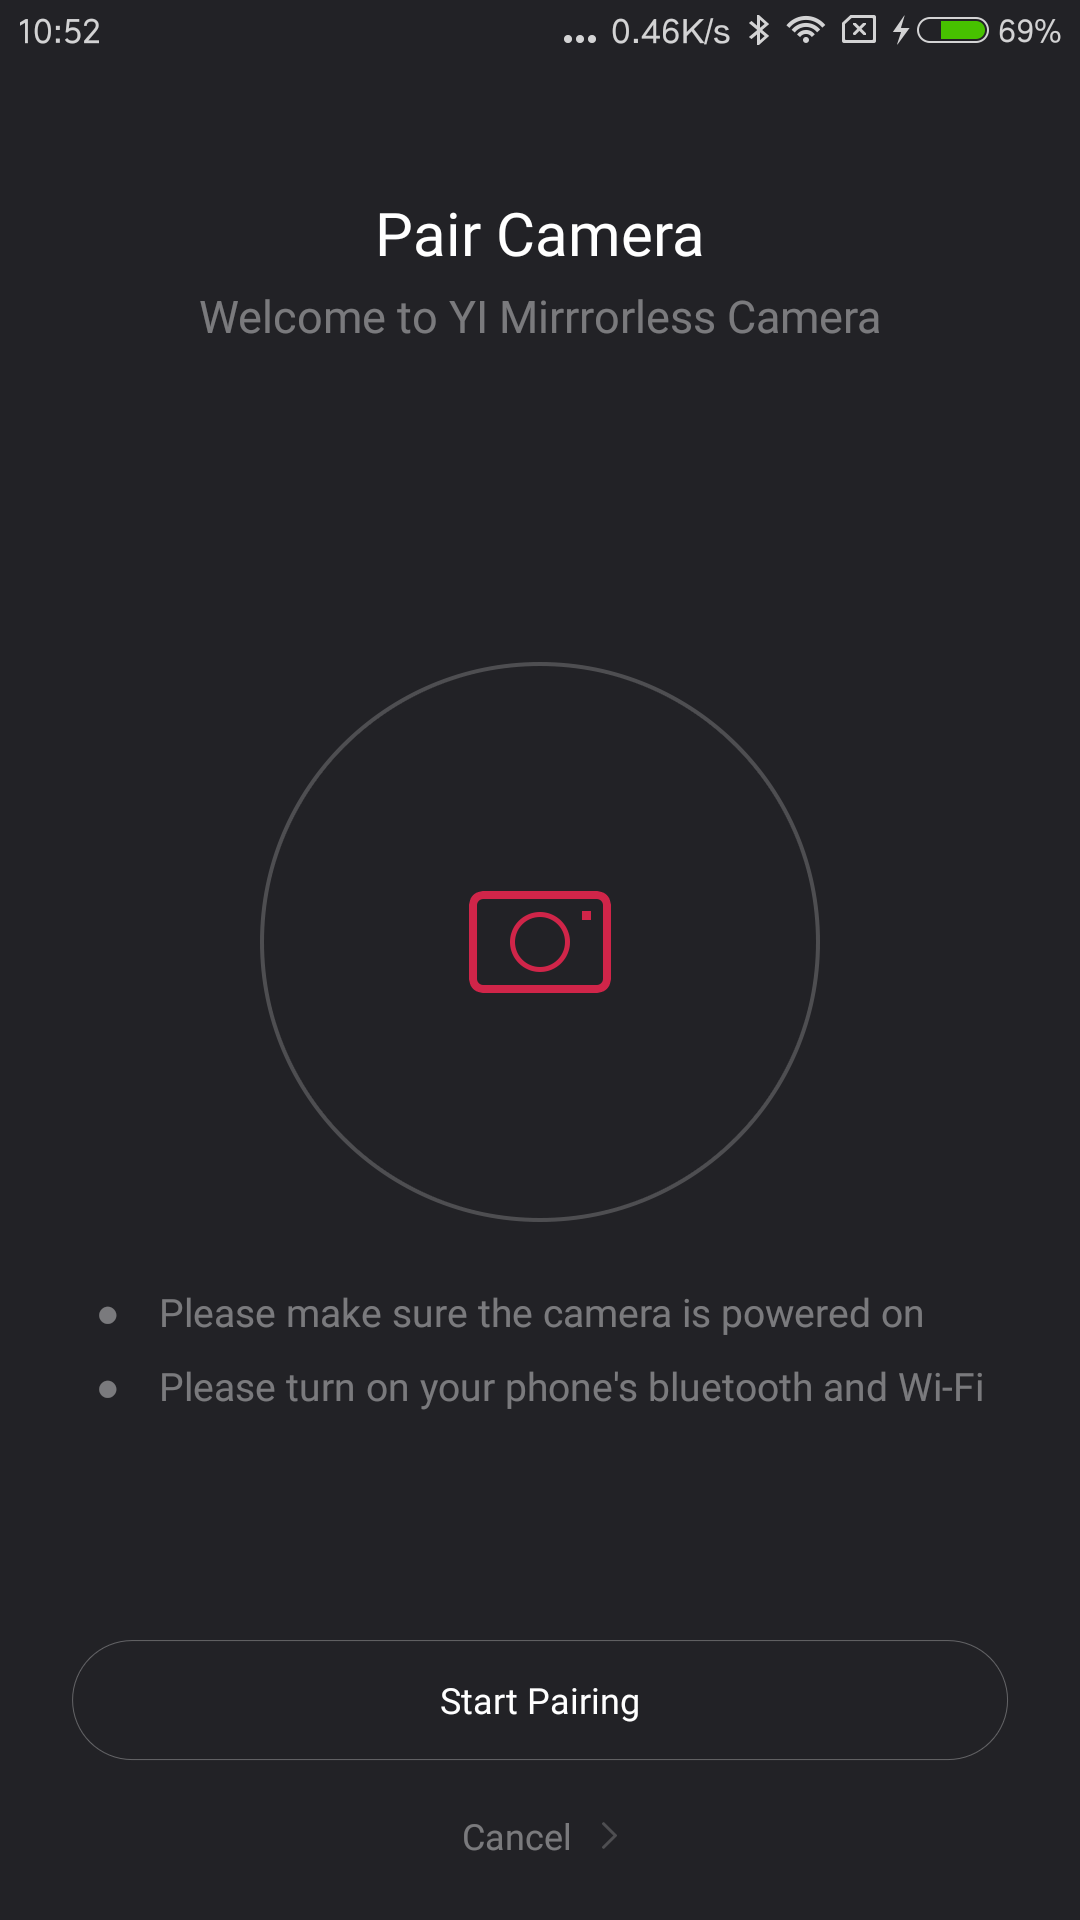
d. Click on 'Start Pairing' to enter the screen below:
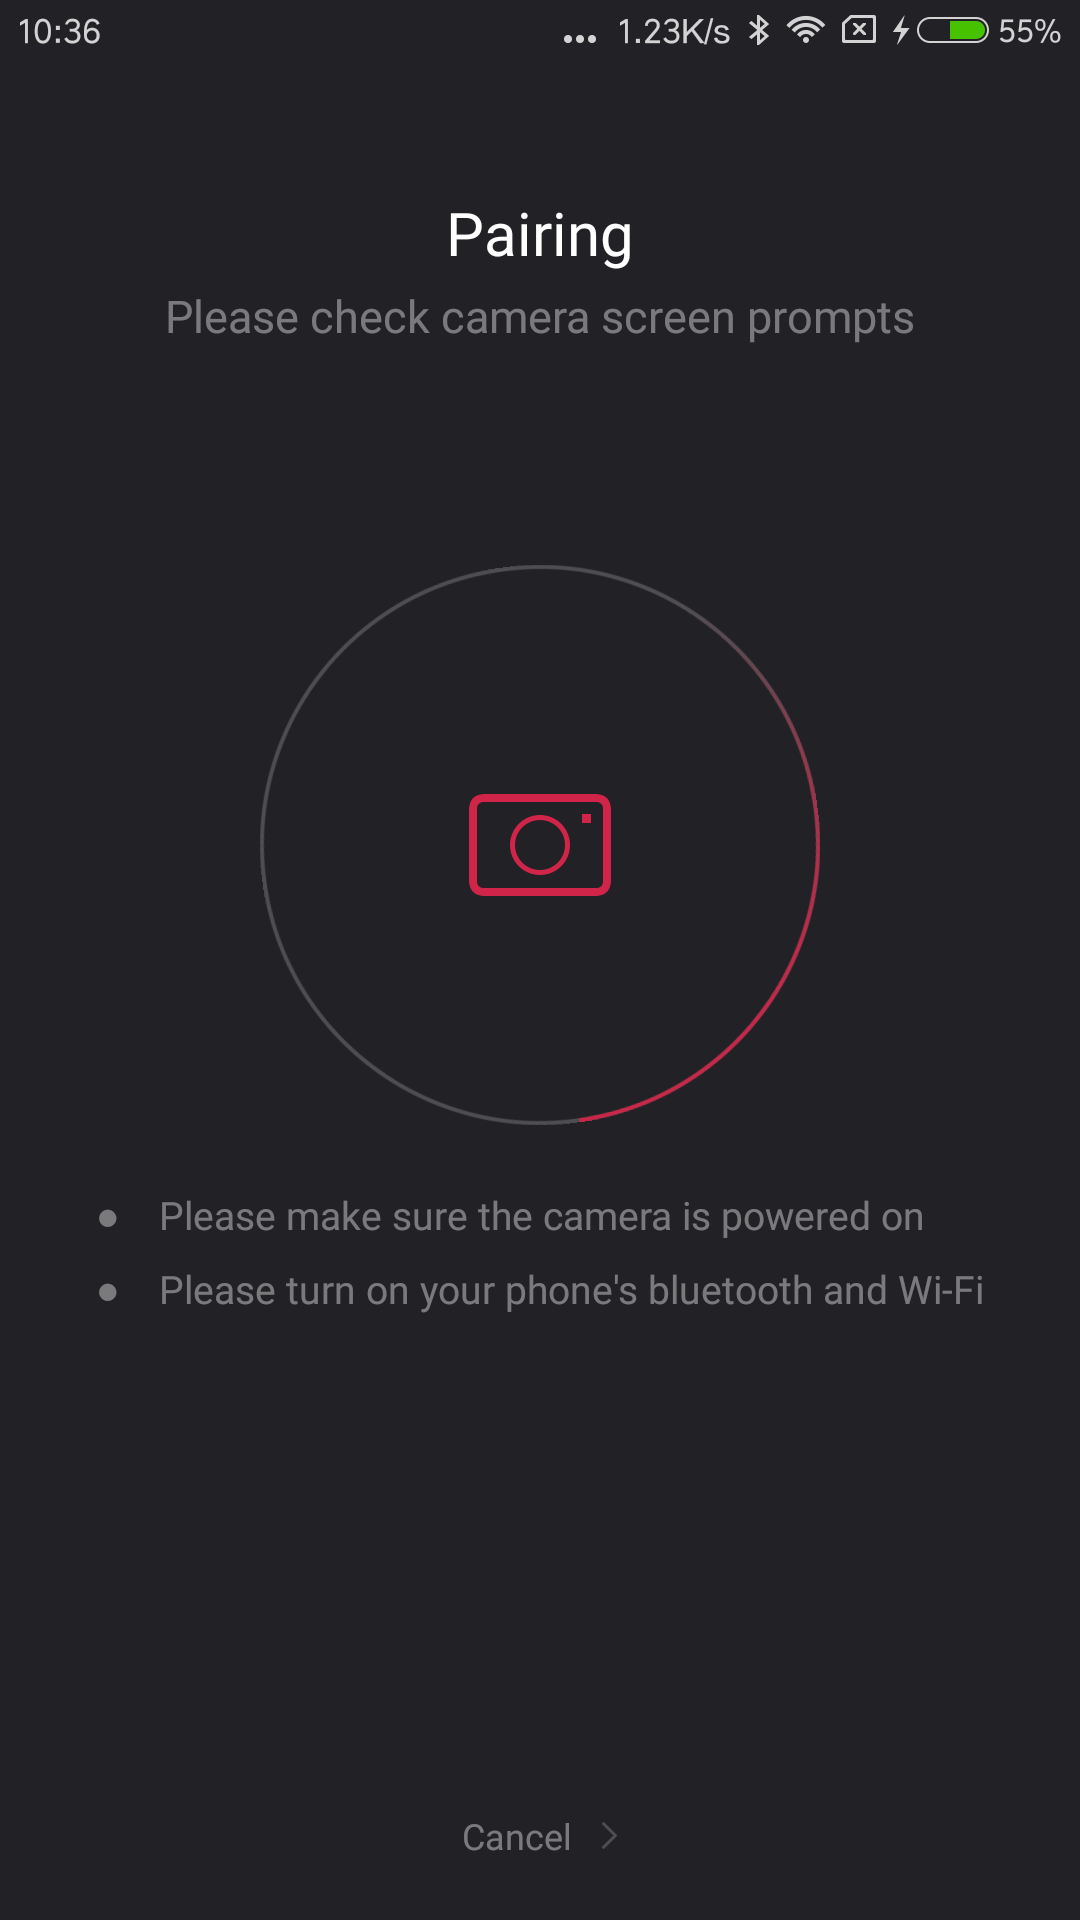
Note: If you have multiple cameras please select the Wi-Fi name of the camera that you want to connect to (you can find the Wi-Fi name of your camera under Connection Settings in MENU) as in screenshot below:
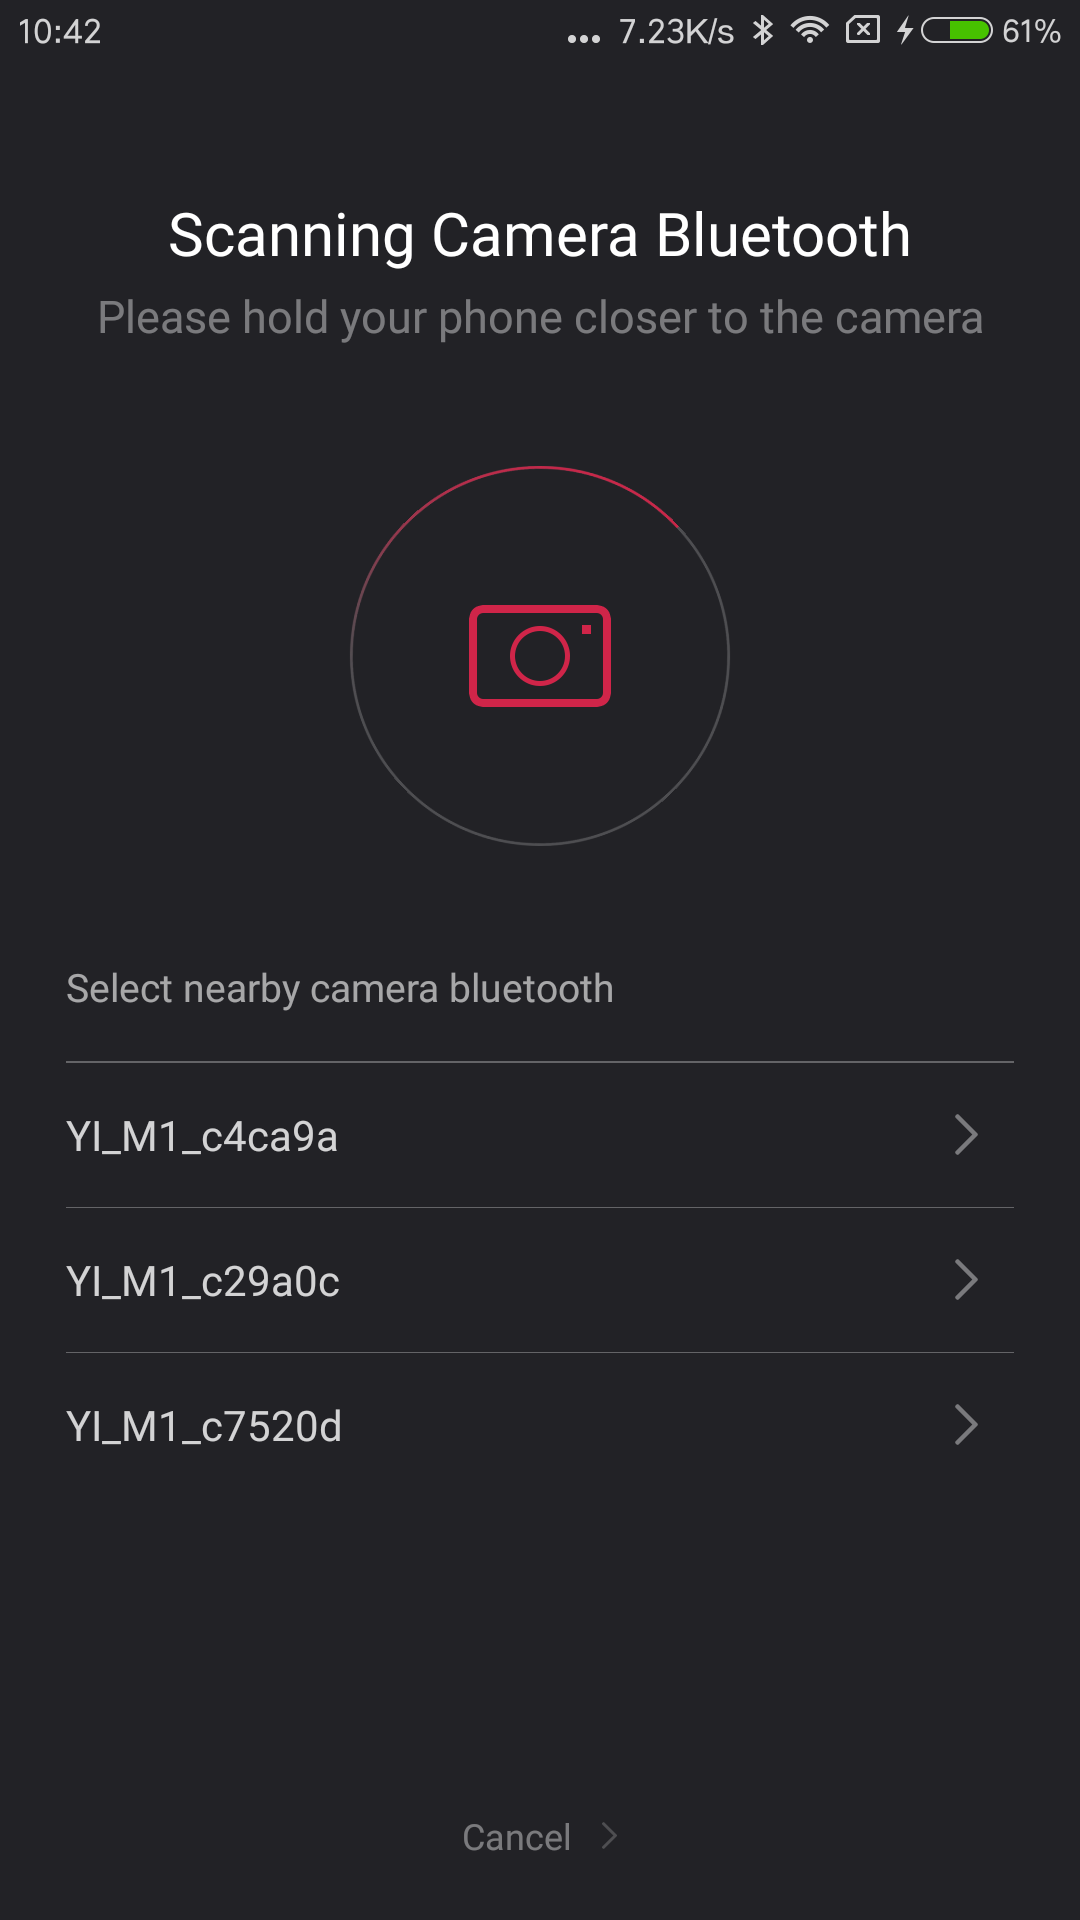
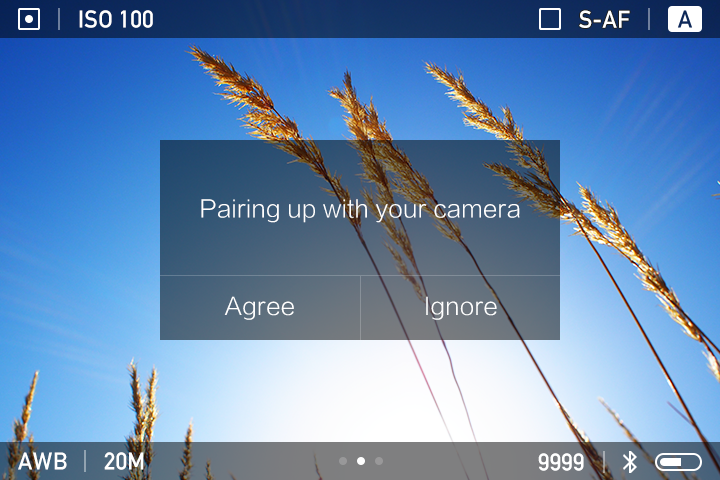
e. Now a window will Appear on the camera. Click on 'Agree' to start the pairing process.
f. You should be able to see the following screen after successful pairing.
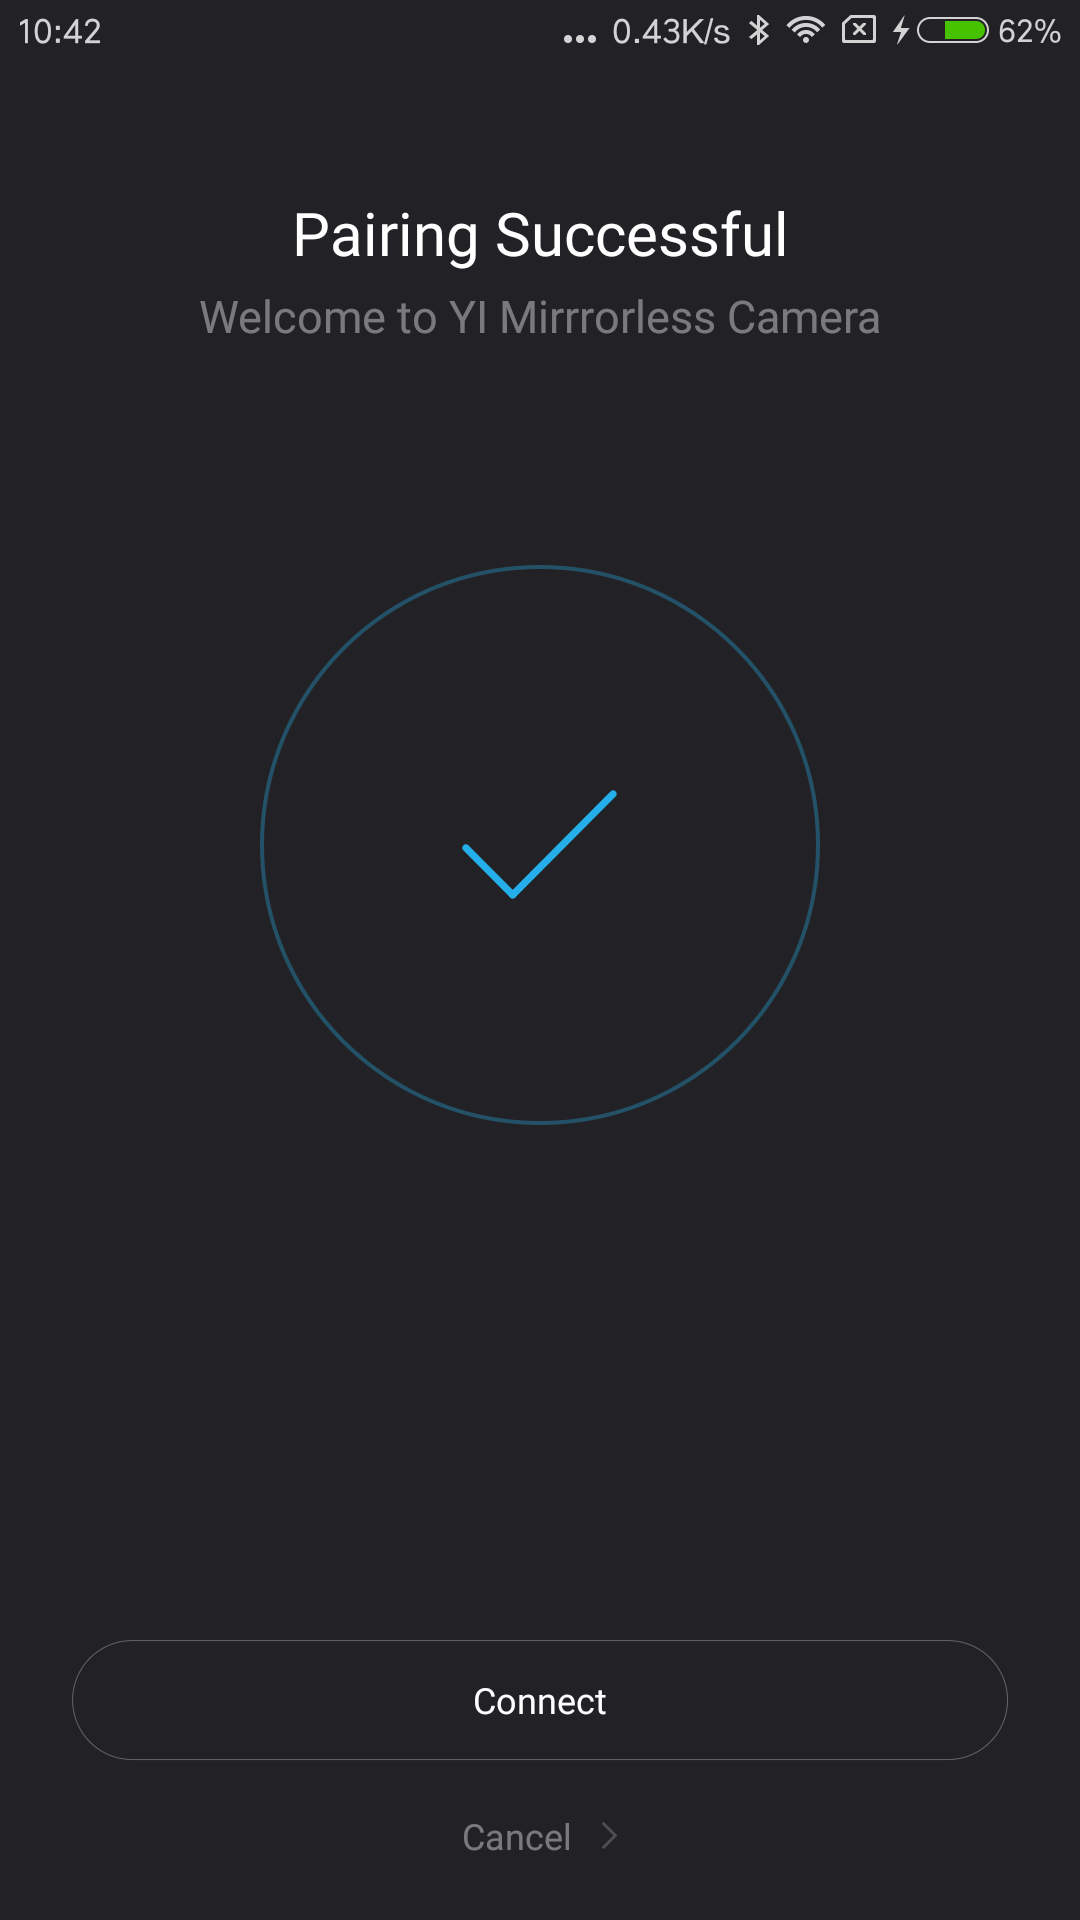
g. Click on 'Connect' and you will see the following screen.
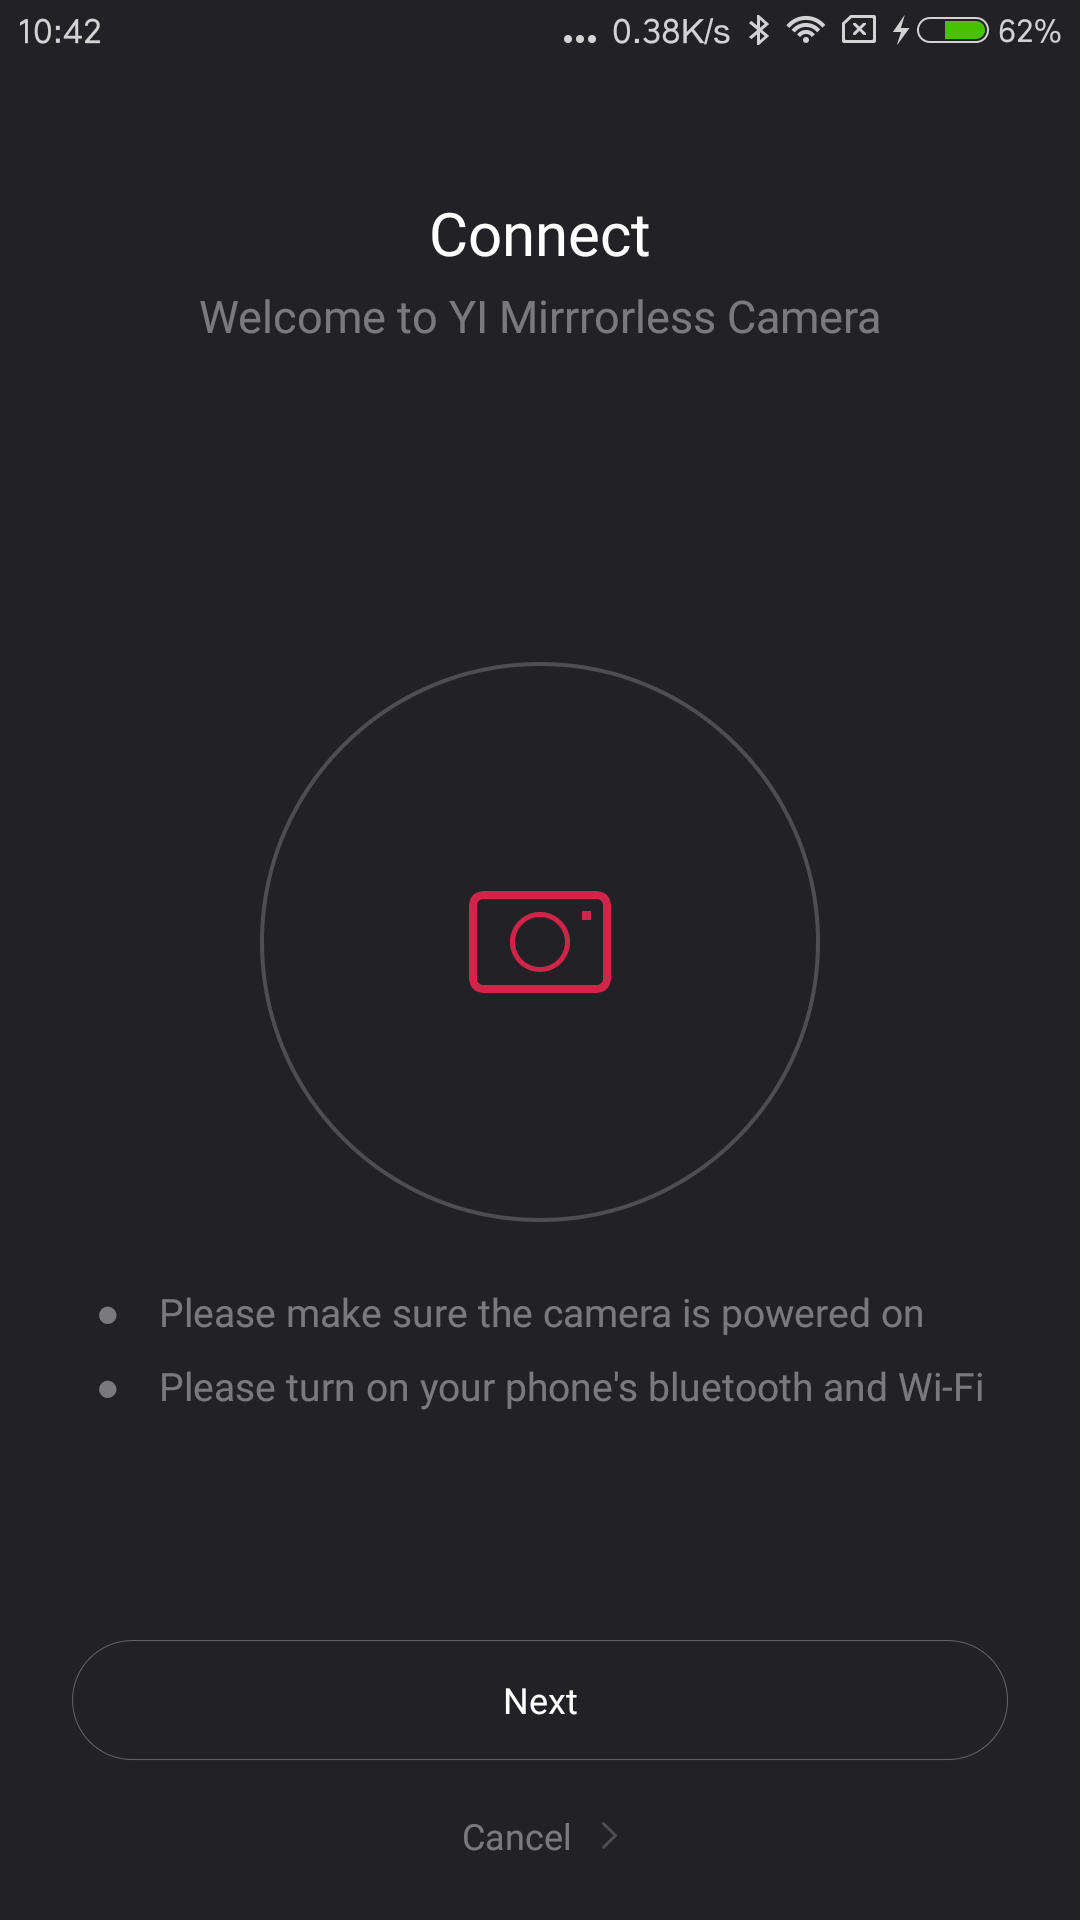
h. Click on 'Next' to start connecting the camera and the App.
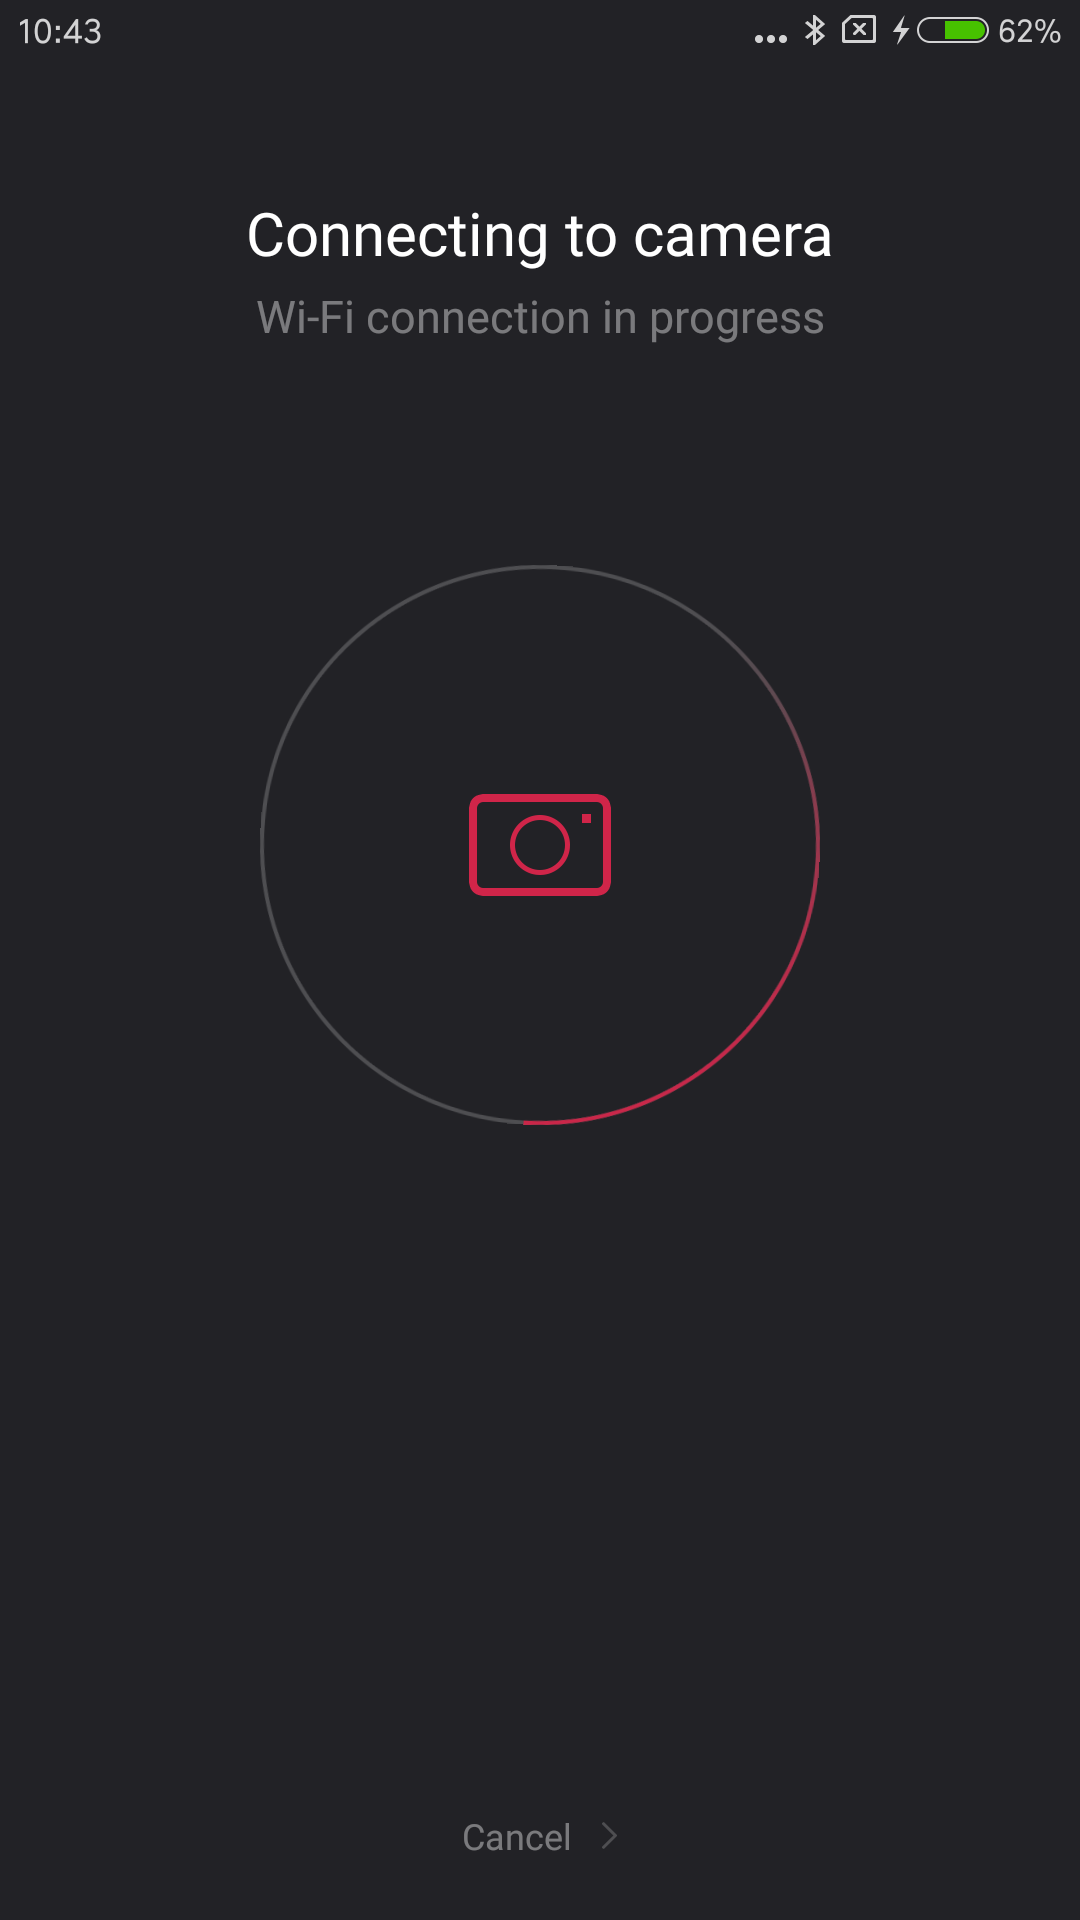
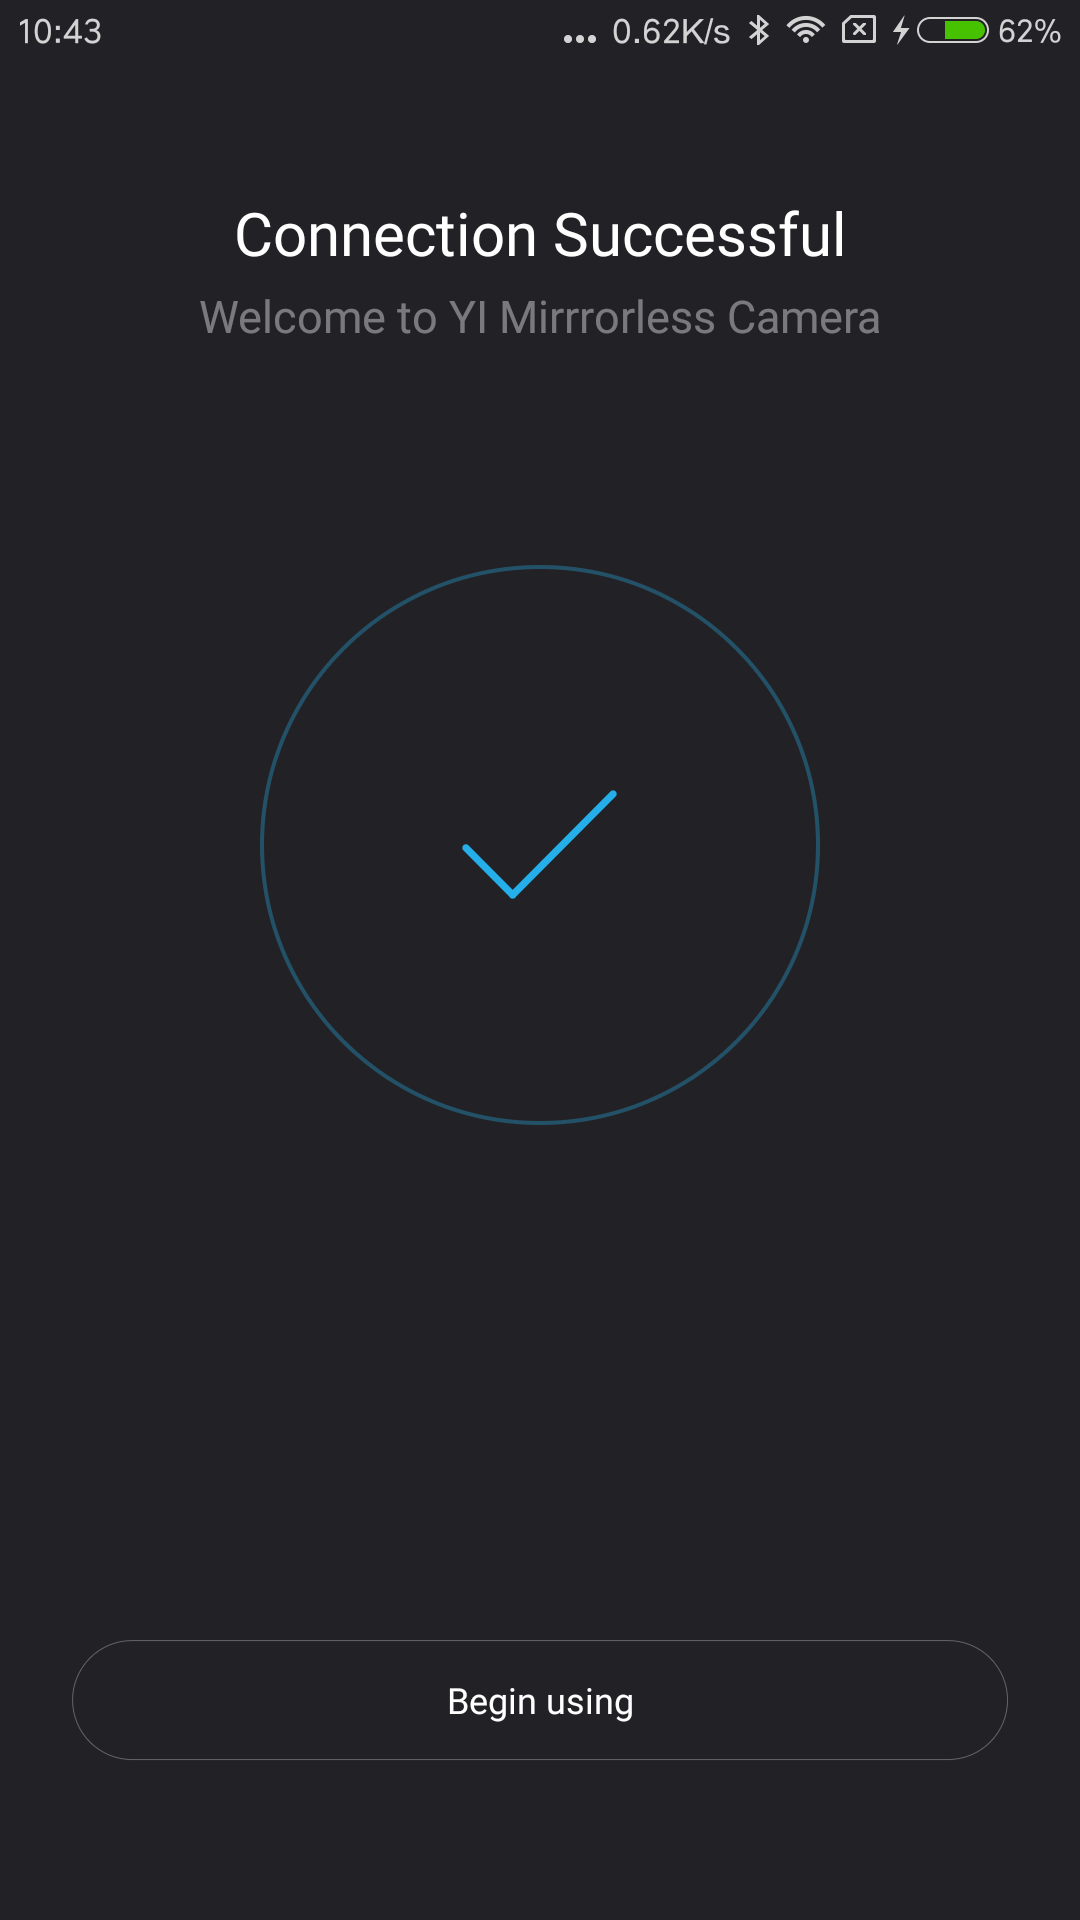
i. A message will Appear on the camera screen after a connection is established successfully: 'On-going data connection. Press the Multi Function Q button to stop connecting'. Photo albums on the camera will be loaded into the App where you can then view, download and edit the photos.
2. Or you can connect from the App's main screen by clicking your account icon on the top-left corner to enter the Settings screen:
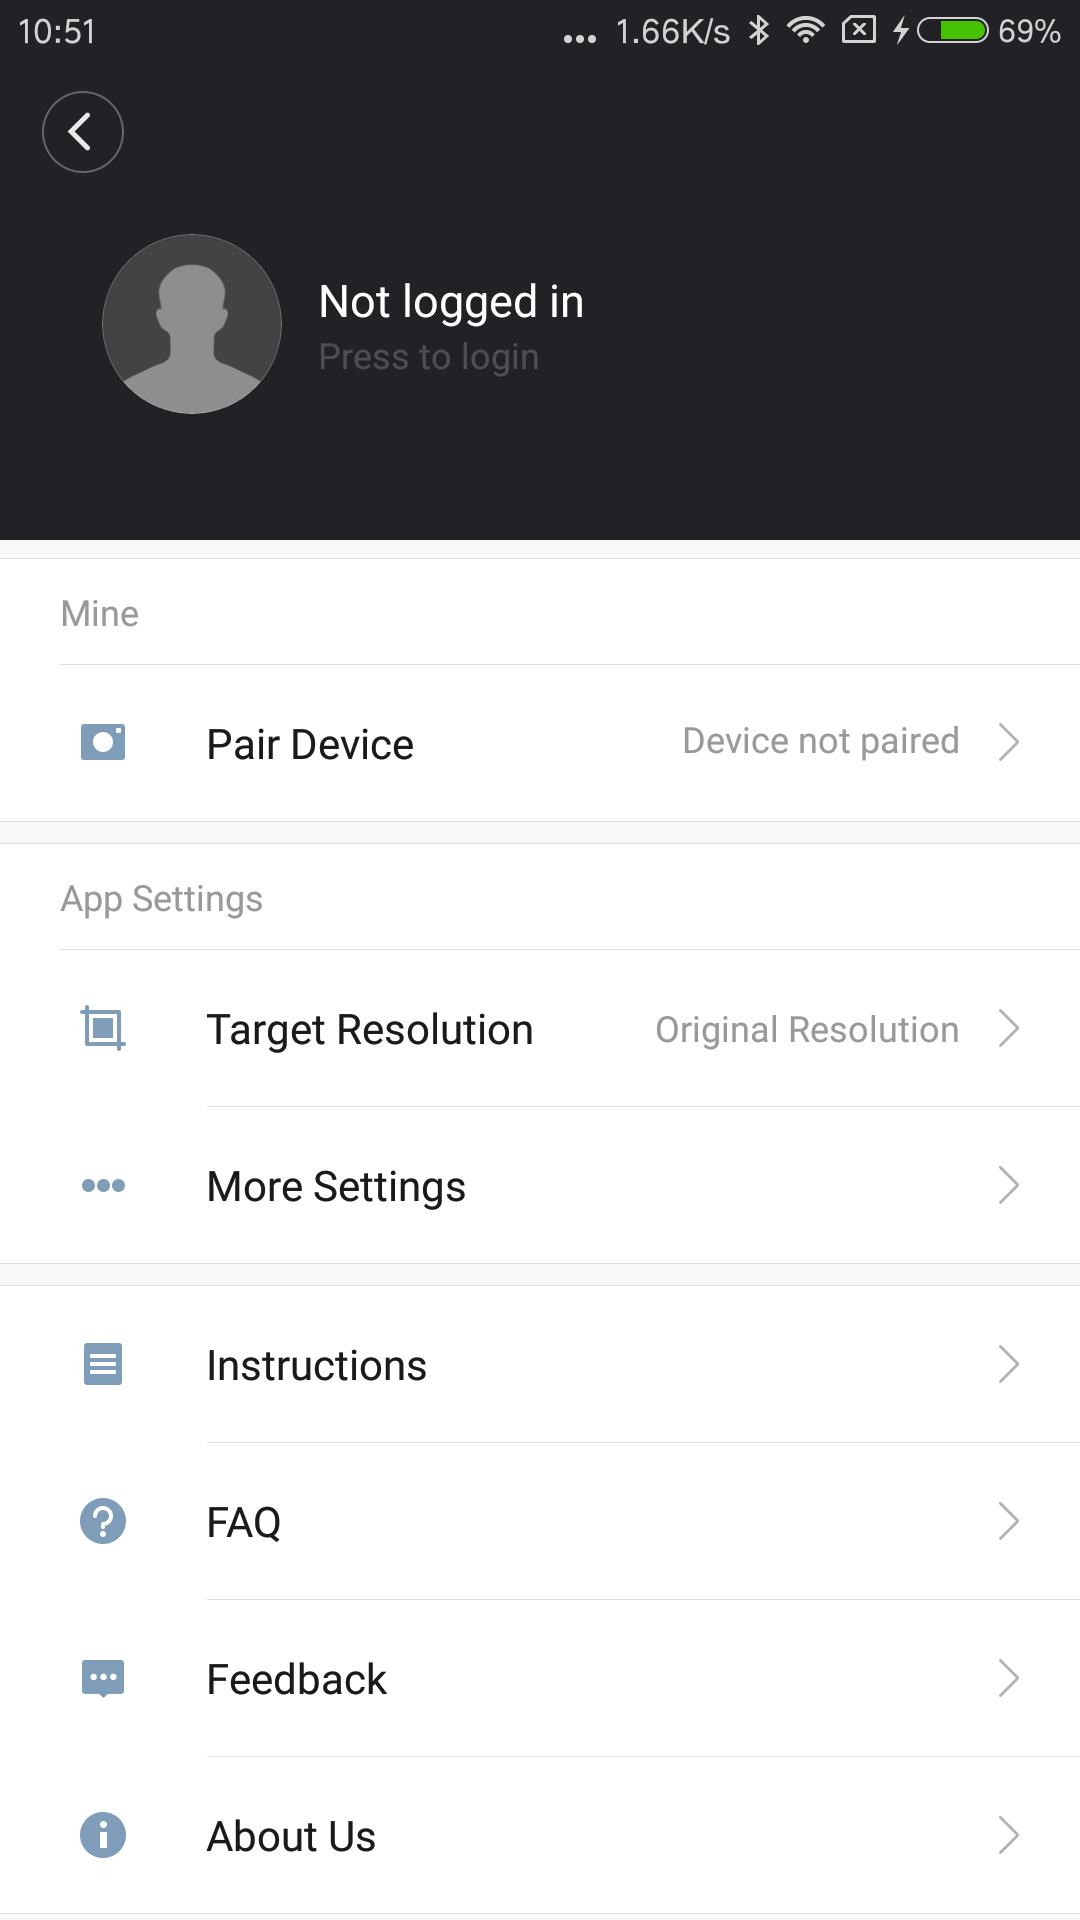
Click on 'Pair Device – Not Paired' to go to the following screen:
Click on 'Pair' and then follow the same procedures as in method 1.

menu
>>

Common Issues
Basic Settings
Camera Connection
Camera Operation
App Usage
SD Card Problems
Firmware Update
Charging and Peripheral Devices
After Sales and Others

How do I connect my Android phone for the first time?
Please make sure Bluetooth and Wi-Fi are turned on.
1. Connecting from Photo Album:
a. Open the App and go to the main screen:

b. Click on the Photo Album icon on the bottom to enter the screen below:

c. Click on 'Pair' to enter the screen below:

d. Click on 'Start Pairing' to enter the screen below:

Note: If you have multiple cameras please select the Wi-Fi name of the camera that you want to connect to (you can find the Wi-Fi name of your camera under Connection Settings in MENU) as in screenshot below:

e. Now a window will Appear on the camera. Click on 'Agree' to start the pairing process.

f. You should be able to see the following screen after successful pairing.

g. Click on 'Connect' and you will see the following screen.

h. Click on 'Next' to start connecting the camera and the App.

i. A message will Appear on the camera screen after a connection is established successfully: 'On-going data connection. Press the Multi Function Q button to stop connecting'. Photo albums on the camera will be loaded into the App where you can then view, download and edit the photos.

2. Or you can connect from the App's main screen by clicking your account icon on the top-left corner to enter the Settings screen:

Click on 'Pair Device – Not Paired' to go to the following screen:

Click on 'Pair' and then follow the same procedures as in method 1.